
You never know when it will come in handy to have a flower made of kitchen towels lying around ;0} so I wrote up a tutorial on how I made mine!

Supplies for one flower:
One Green Dishcloth
One Dishtowel, any color
One Plastic scrubby for flower center {sponges work great too}
and one dowel about 12" long, mine is 3/8"
You will also need rubber bands and ribbon that matches the dishcloth and towel as well.

I actually found this 9 pack of dishcloths, GREEN-I still can't believe I found them, at Walmart! They were $2-3.

Lay your dishcloth down on a table. Take the bottom right corner and fold it up and on top of the top left corner so you have a triangle now instead of a square. Not lay your dowel on top, so the dowel is in the middle of the dishcloth when you are looking at the top portion.

Now take that bottom left corner and fold it up and to the right, so it rests on top of the top right corner.

Without upsetting the placement of the dowel, pinch the cloth down on one side of the dowel and wrap a rubber band around it. Then do the same to the other side.

It should look something like this. Now slide the leaf portion down a bit to give you room to work with the flower part.

Take your dish towel, any variety of fabric is fine. Fold it in half, pinch the fabric that will make up the top petal of your flower, then wrap a rubber band around it.

I like to pull the fabric out a little to fluff the petal. Just pull it out and push it back in until it looks good to you.

This is what it will look like at first. Next, just pick a side, pinch up about half of the towel that is left on that side and wrap with a rubber band.

It will look like this.

Then wrap up the remainder of the towel on that side with a rubber band and do the last two steps to the other side of the towel.


Your finished flower will look like this.

The way I chose to attach the petal portion was to use the same rubber bands wrapped around those bottom two petals and simply wrap one strand of each rubber band around the dowel.

This worked fabulously for me. I was able to make the whole flower and not have to use any glue or sew a stitch!

Now, we still need to attach the plastic scrubby for the flower center.

Pull the knot on the back of the scrubby out a bit and wrap a rubber band around it.

You will need to push your petal portion over and slide it down the dowel just a bit until you have dowel to attach your scrubby to.
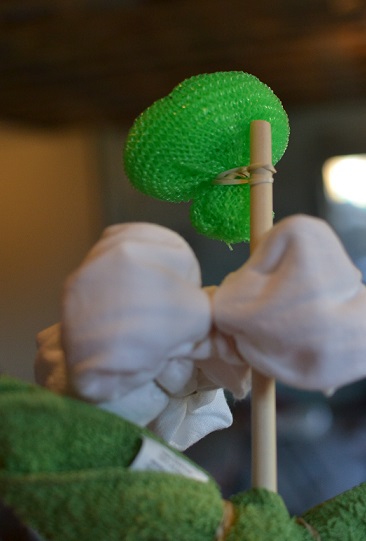
Here is my tree-looking flower just before I put everything back together.

Slide the rubber band from the scrubby over the dowel, then turn the scrubby so it faces front.

You should have room between the petal ends to push that scrubby knot through the petals to secure them both together.
I like to then slide the dowel up so it is actually inside that top petal. It seems stronger that way and holds everything snug.

There you go! You have your flower.

I decided to wrap ribbon over the rubberbands to hide them. This is the back of the flower. Even though my ribbon was thin, it did a great job of covering things up.

Here is the back of the leaf portion as well. So Cute!!!

As a little extra bit of cuteness, I left the ribbon long and tied a little bow at the top of the flower as well.

Cute little bows for the leaves as well.

Now you have a cute little gift with an actual amount of usefulness that you can give to Mom or Grandma on Mother's Day. These flowers make a great project kids can help make too!


Use a wooden spoon for stem
ReplyDelete